
We already installed Ubuntu. Set up root. Now we are going to start up the server again for part 2. Going to login as root.
You could enter commands in the virtual box screen, but copy and paste seems to not work. Plus scroll does not seem to work. So i like to SSH in to it with a SSH client.
Get the server IP:
First we need to get the ip of the sever. When we first login it shows the IP address.

Another way you can get the server ip address is by ifconfig

Connect via SSH:
Open up the terminal App on the Mac. My server IP is 10.0.1.16.
[code lang=”bash”]
ssh SERVERIP -l root
[/code]
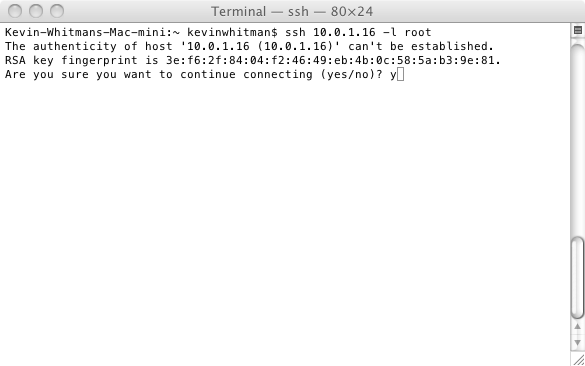 type yes
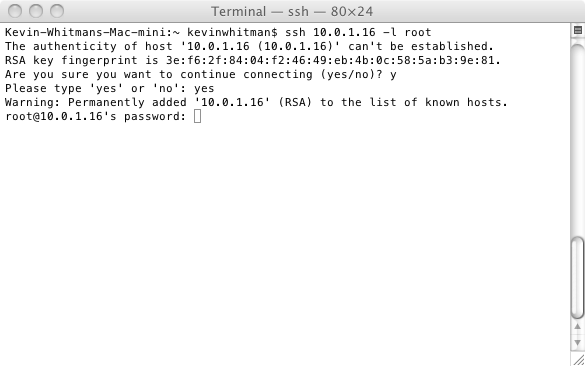 type your password and then your logged in.
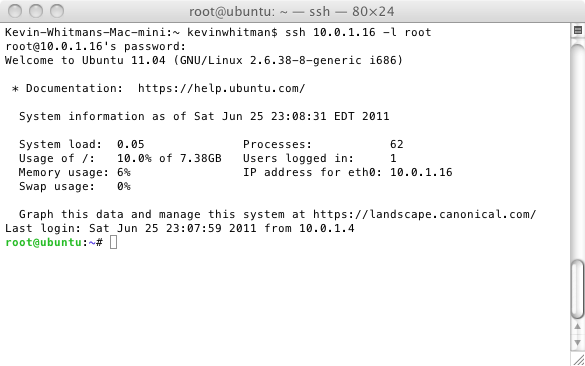 Now your logged in. Another trick you can do is type clear to have a blank screen.
Update your server:
[code lang=”bash”]
apt-get update
[/code]
then type
[code lang=”bash”]
apt-get upgrade
[/code]
It will then tell you if you have any updates available. If you do type y and press enter to install the updates.
Then wait for the server to update.
Install Web Server:
To install the apache web server.
[code lang=”bash”]
apt-get install apache2
[/code]
then type y and hit enter.
After its done you can now type your server ip in to your web browser and see the “Its Works!”

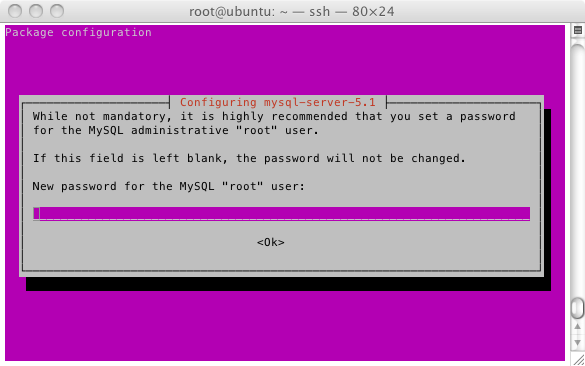
Install MySQL:
[code lang=”bash”]
apt-get install mysql-server
[/code]
then press y
then press enter and wait.
enter in the MySql Server password, i’m going to leave it blank.
Install PHP:
[code lang=”bash”]
apt-get install php5 php5-gd php-pear php5-mysql php5-curl php5-memcache
[/code]
Then type y, press enter and Wait.
Install PhpMyAdmin
[code lang=”bash”]
apt-get install phpmyadmin
[/code]
Then type y, press enter and Wait.
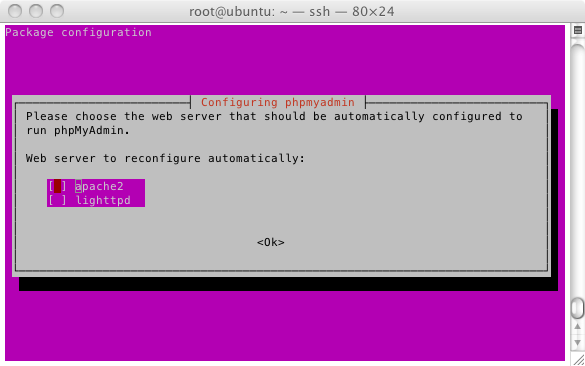
Select the web server your using. Make it apache2 is selected and press enter.
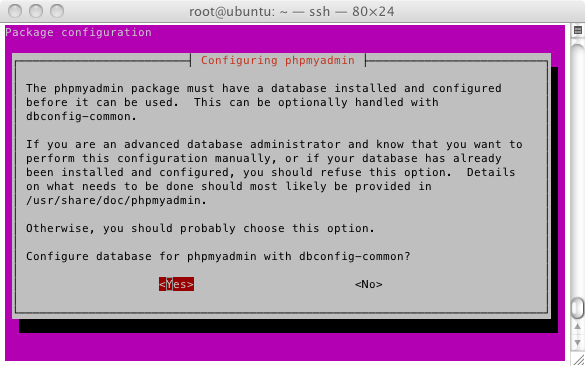
Choose yes to configure for phpmyadmin with dbconfig.
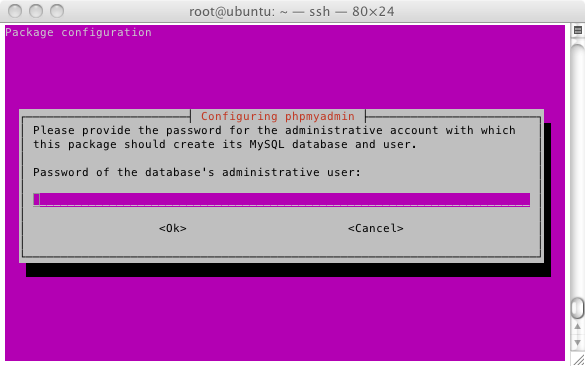
enter the database password you set when you installed MySql.
 then copy the Phpmyadmin config file by typing:
[code lang=”bash”]
ln -s /etc/phpmyadmin/apache.conf /etc/apache2/conf.d/phpmyadmin.conf
/etc/init.d/apache2 restart
[/code]
Now we need to SFTP in the server and edit the PhpMyAdmin config file to allow no password logins, if you set no password.
sftp in to the server
go to /etc/phpmyadmin
download the config.inc.php to your computer.
show how to sftp in
set up a php info page
Go to line 71 you will see
[code lang=”php”]
// $cfg[‘Servers’][$i][‘AllowNoPassword’] = TRUE;
[/code]
uncomment that line out by removing the // before it, and then save.
Upload the file back to the server.
Go to /phpmyadmin on your server, put root in as the username and put your password in where it says password. Then you can use PhpMyAdmin like on any server.
Allow mod rewrite:
[code lang=”bash”]
a2enmod rewrite
[/code]
go to /etc/apache2/sites-available/
edit default
change AllowOverride None to AllowOverride All
[code lang=”bash”]
/etc/init.d/apache2 restart
[/code]
Do this in all the places you see it. Then upload default back to the server.
Putting content on your server:
Go to /var/www and there you can upload, move and delete the files for your test server.
Thats it. You now have a full working Linux server to test and develop on.
Other posts in this series
1. Set up a sandbox to test PHP Apps: Part 1, Set up the VM
2. Set up a sandbox to test PHP Apps: Part 2, Install Web Server, PHP, MySQL and PhpMyAdmin
